概述
Zabbix大家都很熟悉,一般的是使用MySQL作为存储库来使用的,而我看使用手册上是使用postgresql也是可以的,所以就做了一次基于pg的zabbix搭建测试,记录下来,分享给大家
Server端配置
配置PG环境
安装好pg,且在root和postgres下都配置好pg的环境变量,以供后续使用
在hba控制文件中直接加入这一行
host zabbix zabbix 192.168.0.0/24 trusthost all all 127.0.0.1/32 md5
配置apache
创建user
[root@Zabbix_GW_TEST opt]# adduser apache
准备好安装包并解压
[root@Zabbix_GW_TEST opt]# ls httpd-2.4.37.tar.gzhttpd-2.4.37.tar.gz[root@Zabbix_GW_TEST opt]# tar -xvzf httpd-2.4.37.tar.gz
编译安装
执行编译命令
[root@Zabbix_GW_TEST httpd-2.4.37]# ./configure --prefix=/usr/local/apache --enable-rewrite --enable-deflate --enable-expires --enable-headers --enable-modules=most --with-mpm=worker --enable-so
报错:
configure: error: APR not found. Please read the documentation.
解决:
yum install apryum install apr-util-devel
报错:
configure: error: in `/opt/httpd-2.4.37':configure: error: C compiler cannot create executablesSee `config.log' for more details
解决:
yum install gcc
问题:
configure: error: pcre-config for libpcre not found. PCRE is required and available from http://pcre.org/
解决:
yum -y install pcre-devel
问题:
configure: error: mod_deflate has been requested but can not be built due to prerequisite failures
解决:
yum install -y zlib-devel
以下画面说明编译成功
configure: summary of build options:Server Version: 2.4.37Install prefix: /usr/local/apacheC compiler: gcc -std=gnu99CFLAGS: -pthreadCPPFLAGS: -DLINUX -D_REENTRANT -D_GNU_SOURCELDFLAGS:LIBS:C preprocessor: gcc -E
继续安装
gmakegmake install
安装成功之后安装目录也就生成文件了
[root@Zabbix_GW_TEST apache]# lsbin build cgi-bin conf error htdocs icons include logs man manual modules
建立脚本根目录
用来存放html信息
mkdir /home/wwwchown -R apache:apache /home/www
配置运行参数
[root@nfs httpd-2.2.31]# vim /usr/local/apache/conf/httpd.conf#监听portListen 80#运营apache服务的用户及用户组,为apacheUser apacheGroup apache#管理员的邮箱是ServerAdmin 1058582934@qq.com#配置脚本根目录DocumentRoot "/home/www"#配置ServerName 127.0.0.1:80<Directory />Options FollowSymLinksAllowOverride NoneOrder deny,allowallow from all</Directory><Directory "/home/www">Options Indexes FollowSymLinksAllowOverride NoneOrder allow,denyAllow from all</Directory>
配置环境变量
添加一行环境变量到文件中
export PATH=/usr/local/apache/bin:$PATH[root@Zabbix_GW_TEST apache]# source ~/.bash_profile[root@Zabbix_GW_TEST apache]# which apachectl/usr/local/apache/bin/apachectl
启动apache服务
apachectl start
顺便配置开机自动
vim /etc/rc.d/rc.local/usr/local/apache/bin/apachectl start
至此,Apache配置完成
安装配置php
安装php依赖包
wget http://ftp.gnu.org/pub/gnu/libiconv/libiconv-1.14.tar.gztar zxf libiconv-1.14.tar.gz./configure --prefix=/usr/local/libiconvmakemake install
准备好包并解压
tar -xvzf php-5.5.38.tar.gz
编译
./configure --prefix=/usr/local/php --with-apxs2=/usr/local/apache/bin/apxs --with-xmlrpc --with-openssl --with-zlib --with-freetype-dir --with-gd --with-jpeg-dir --with-png-dir --with-iconv=/usr/local/libiconv --enable-short-tags --enable-sockets --enable-soap --enable-mbstring --enable-static --enable-gd-native-ttf --with-curl --with-xsl --enable-ftp --with-libxml-dir --with-pgsql=/usr/postgresql --enable-fpm --enable-bcmath --with-gettext
报错
Sorry, I cannot run apxs. Possible reasons follow:1. Perl is not installed2. apxs was not found. Try to pass the path using --with-apxs2=/path/to/apxs3. Apache was not built using --enable-so (the apxs usage page is displayed)The output of /usr/local/apache/bin/apxs follows:./configure: /usr/local/apache/bin/apxs: /replace/with/path/to/perl/interpreter: bad interpreter: No such file or directoryconfigure: error: Aborting
解决:将apache的bin文件下的apxs文件第一行改为
#!/usr/bin/perl -w
报错:
configure: error: xml2-config not found. Please check your libxml2 installationyum install libxml2-devel
报错
configure: error: Cannot find OpenSSL's <evp.h>yum install openssl openssl-devel
报错
configure: error: Please reinstall the libcurl distribution -easy.h should be in <curl-dir>/include/curl/yum install curl curl-devel
报错
configure: error: There is something wrong. Please check config.log for more information.curl-devel-7.15.5-2.el5安装
报错
configure: error: jpeglib.h not found.yum -y install libjpeg-devel
报错
configure: error: png.h not found.yum install libpng libpng-devel
报错:
configure: error: freetype-config not found.yum install freetype-devel
报错
configure: error: xslt-config not found. Please reinstall the libxslt >= 1.1.0 distributionyum -y install libxslt libxslt-devel
显示如下,则编译完成
creating main/internal_functions_cli.c+--------------------------------------------------------------------+| License: || This software is subject to the PHP License, available in this || distribution in the file LICENSE. By continuing this installation || process, you are bound by the terms of this license agreement. || If you do not agree with the terms of this license, you must abort || the installation process at this point. |+--------------------------------------------------------------------+Thank you for using PHP.config.status: creating php5.specconfig.status: creating main/build-defs.hconfig.status: creating scripts/phpizeconfig.status: creating scripts/man1/phpize.1config.status: creating scripts/php-configconfig.status: creating scripts/man1/php-config.1config.status: creating sapi/cli/php.1config.status: creating sapi/fpm/php-fpm.confconfig.status: creating sapi/fpm/init.d.php-fpmconfig.status: creating sapi/fpm/php-fpm.serviceconfig.status: creating sapi/fpm/php-fpm.8config.status: creating sapi/fpm/status.htmlconfig.status: creating sapi/cgi/php-cgi.1config.status: creating ext/phar/phar.1config.status: creating ext/phar/phar.phar.1config.status: creating main/php_config.hconfig.status: executing default commands
安装
makemake install
准备配置文件
[root@Zabbix_GW_TEST php-5.5.38]# cp php.ini-development /usr/local/php/lib/php.ini[root@Zabbix_GW_TEST php-5.5.38]# vi /usr/local/php/lib/php.ini
修改配置文件
[root@nfs php-5.5.38]# cp php.ini-development /usr/local/php/lib/php.ini[root@nfs php-5.5.38]# vim /usr/local/php/lib/php.inierror_reporting = E_ALL & ~E_NOTICE#报告所有的错误,但除了E_NOTICE这一种display_errors = On#在终端显示出错信息,这个在生产环境最好设置成offtrack_errors = Off#是否在变量$php_errormsg中保存最近一个错误或警告消息post_max_size = 16M#表单最大提交的数据量大小upload_max_filesize = 16M#准许上传文件大小限制为16Mdate.timezone = PRC#中华人民共和国时区expose_php = Off#隐藏php版本信息curl -I www.ha97.comHTTP/1.1 200 OKServer: nginxDate: Tue, 20 Jul 2010 05:45:13 GMTContent-Type: text/html; charset=UTF-8Connection: keep-aliveVary: Accept-Encoding#已经彻底隐藏了PHP版本。extension_dir = "/usr/local/php/lib/php/extensions/no-debug-zts-20121212/"#扩展模块存放目录
修改Apache的文件,在重启
[root@nfs php-5.5.38]# vim /usr/local/apache/conf/httpd.conf增加下面内容<IfModule dir_module>DirectoryIndex index.php index.html</IfModule><IfModule mime_module>AddType application/x-httpd-php-source .phpsAddType application/x-httpd-php .php .phtml</IfModule>
换一个思路的nginx搭建
概述
在apache配置解析php的操作种,遇到种种坑,Apache的配置不太熟悉,界面打不开php文件,理论上问题是出在Apache配置访问php上。但是我能力有限,解决不来,所以就换一个NGINX试试。
编译安装
上传解压,并编译。NGINX的编译相对简单,就不做详细记录
tar -xvzf nginx-1.6.0.tar.gzcd nginx-1.6.0./configure --prefix=/usr/local/nginx --without-http_memcached_module --user=www --group=www --with-http_stub_status_module --with-http_ssl_module --with-http_gzip_static_modulemakemake install
配置NGINX访问PHP
这个是NGINX的关键,因为zabbix的界面全部都是PHP语言写的,必须使用PHP软件才能解析应用
server {listen 80;server_name localhost;location ~ \.(php|php5)?$ {root /data/html;fastcgi_pass 127.0.0.1:9000;fastcgi_index index.php;fastcgi_param SCRIPT_FILENAME /data/html$fastcgi_script_name;include fastcgi_params;}location ~* ^.+\.(ico|gif|jpg|jpeg|png|html|css|htm|bmp|js|svg)$ {root /data/html;}}
配置nginx.conf文件。增加两个location,第一个location增加的是站点的地址信息。第二个是增加解析各种图片样式的功能(因为在没有加的时候,我打开的zabbix界面全部都是只有文字,没有任何图片与样式,如下。原因就是PHP没有解析这些内容)
创建好站点目录
浏览器通过端口来访问服务器的文件,并用解析器解析,我们需要先准备好这些文件。zabbix的PHP文件是放在源码包里的,解压后就可以看到可以在上面的配置文件中可以看到我已经选择了/data/html
cp -r /opt/zabbix-4.0.2/frontends/php/* /data/html
注意赋权
启动nginx
把环境变量配置在root下
export PATH=/usr/local/nginx/sbin:$PATH
启动nginx,没有报错则启动成功,看监听端口和后台进程
[root@Zabbix_GW_TEST ~]# netstat -lnp|grep 80tcp 0 0 0.0.0.0:80 0.0.0.0:* LISTEN 25373/nginx: master[root@Zabbix_GW_TEST ~]# ps -ef|grep nginxroot 12817 10266 0 18:11 pts/1 00:00:00 grep --color=auto nginxroot 25373 1 0 01:21 ? 00:00:00 nginx: master process nginxwww 27717 25373 0 02:07 ? 00:00:00 nginx: worker process
Zabbix配置
用户环境配置好
用户
adduser zabbix
编译zabbix
编译
./configure --prefix=/usr/local/zabbix --enable-server --enable-proxy --enable-agent --enable-ipv6 --with-postgresql=/usr/local/pgsql/bin/pg_config --with-net-snmp --with-ssh2 --with-openipmi --with-ldap --with-libcurl --with-iconv
安装依赖
yum install net-snmp-develyum install libssh2-develyum install OpenIPMI-develyum install openldap-develyum install libevent-develyum install curl-devel
编译到此界面则安装成功
************************************************************ Now run 'make install' ** ** Thank you for using Zabbix! ** <http://www.zabbix.com> ************************************************************
执行make install
配置好环境变量
将此行写进配置文件中
PATH=/usr/local/zabbix/bin:/usr/local/zabbix/sbin:$PATH
创建zabbix 数据库
postgres=# create role zabbix loginpostgres-# ;CREATE ROLEpostgres=# \password zabbixEnter new password:Enter it again:postgres=# create database zabbix with template template0 encoding 'UTF8' ;CREATE DATABASEpostgres=# grant all on database zabbix to zabbix;GRANTpostgres=# \q
导入zabbix数据
在源码下,有zabbix数据库的数据
cd /opt/zabbix-4.0.2/database/postgresql/psql -Uzabbix -dzabbix -h127.0.0.1 -f schema.sqlpsql -Uzabbix -dzabbix -h127.0.0.1 -f images.sqlpsql -Uzabbix -dzabbix -h127.0.0.1 -f data.sql
配置zabbix_server参数
[root@Zabbix_GW_server ~]# vim /usr/local/zabbix/etc/zabbix_server.conf#监听portListenPort=10051#日志存放地点及大小LogFile=/tmp/zabbix_server.logLogFileSize=10#pid文件存放地点PidFile=/tmp/zabbix_server.pid#下面几个参数是配置数据库连接参数DBHost=127.0.0.1DBName=zabbixDBUser=zabbixDBPassword=zabbixDBPort=5432#监听ip范围ListenIP=0.0.0.0#media types中使用script存放目录AlertScriptsPath=/usr/local/zabbix/alertscripts
启动服务
zabbix_server
查看是否有错,就查看zabbix_server 的启动日志,如果有报错,按照报错修改。反正我安装的时候真的报错频出,经历过,懂得都懂
查看web界面
此时就可以通过web界面来访问zabbix了
输入地址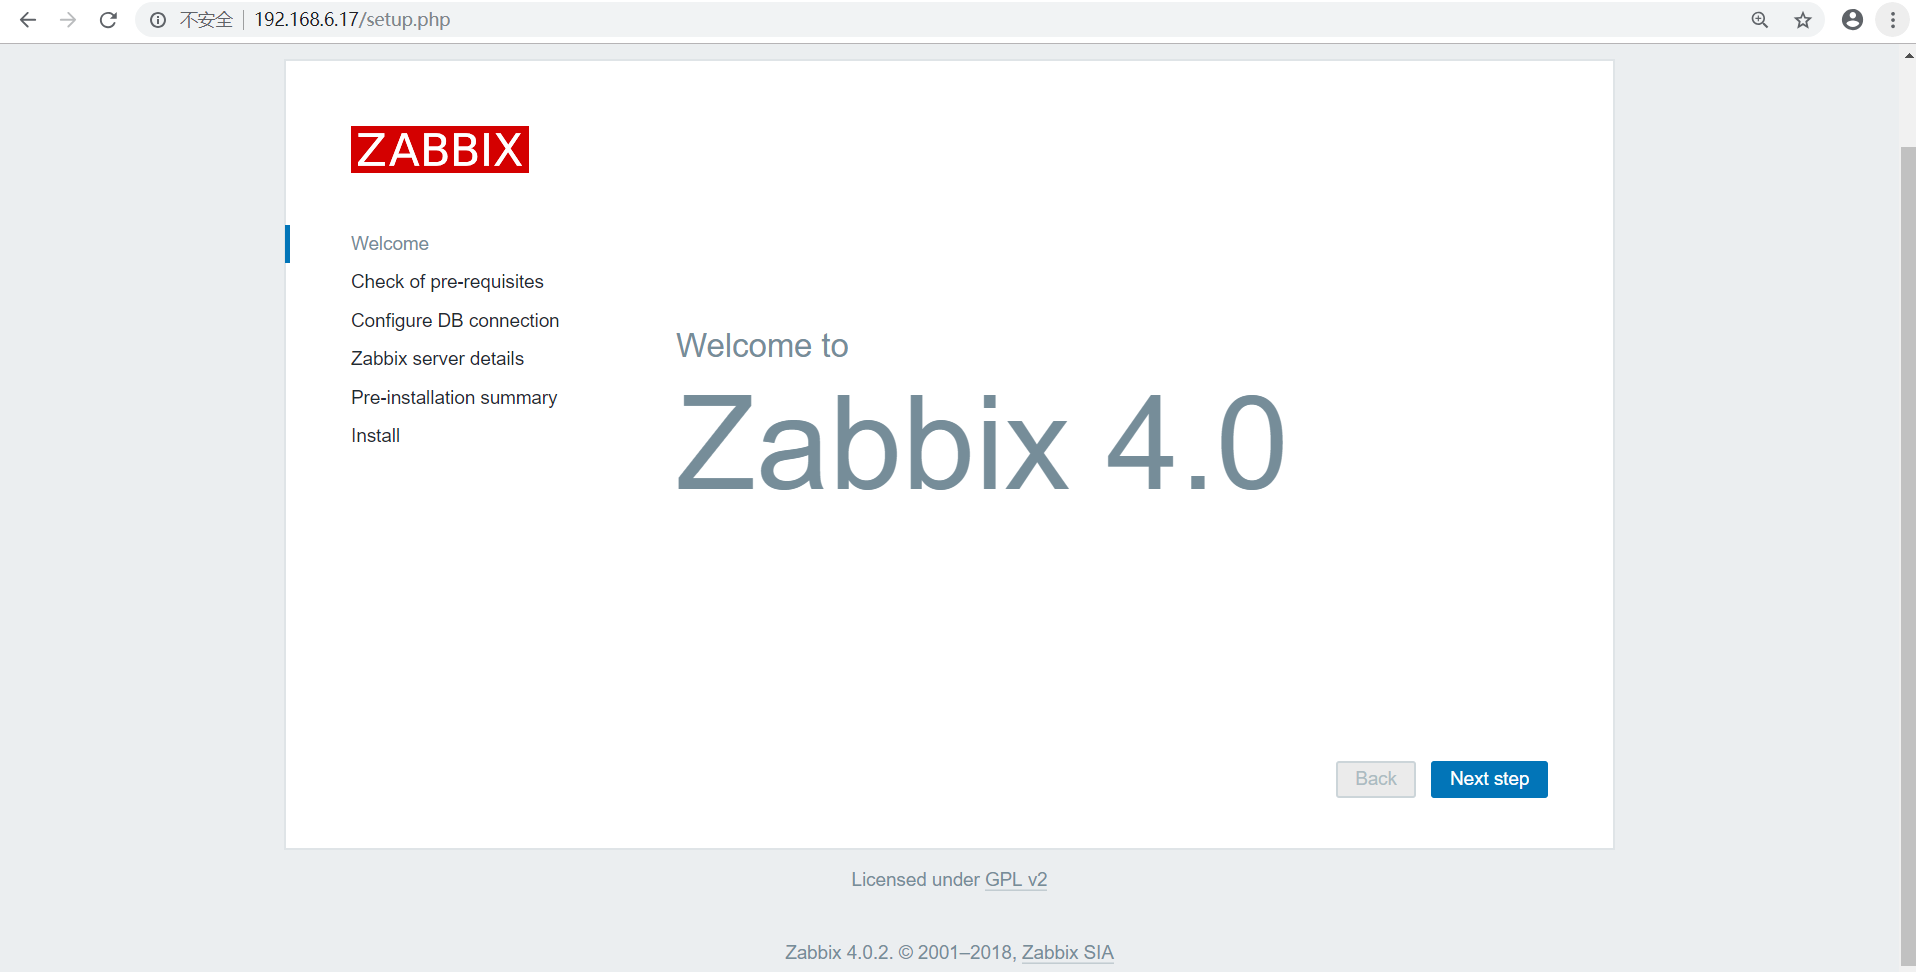
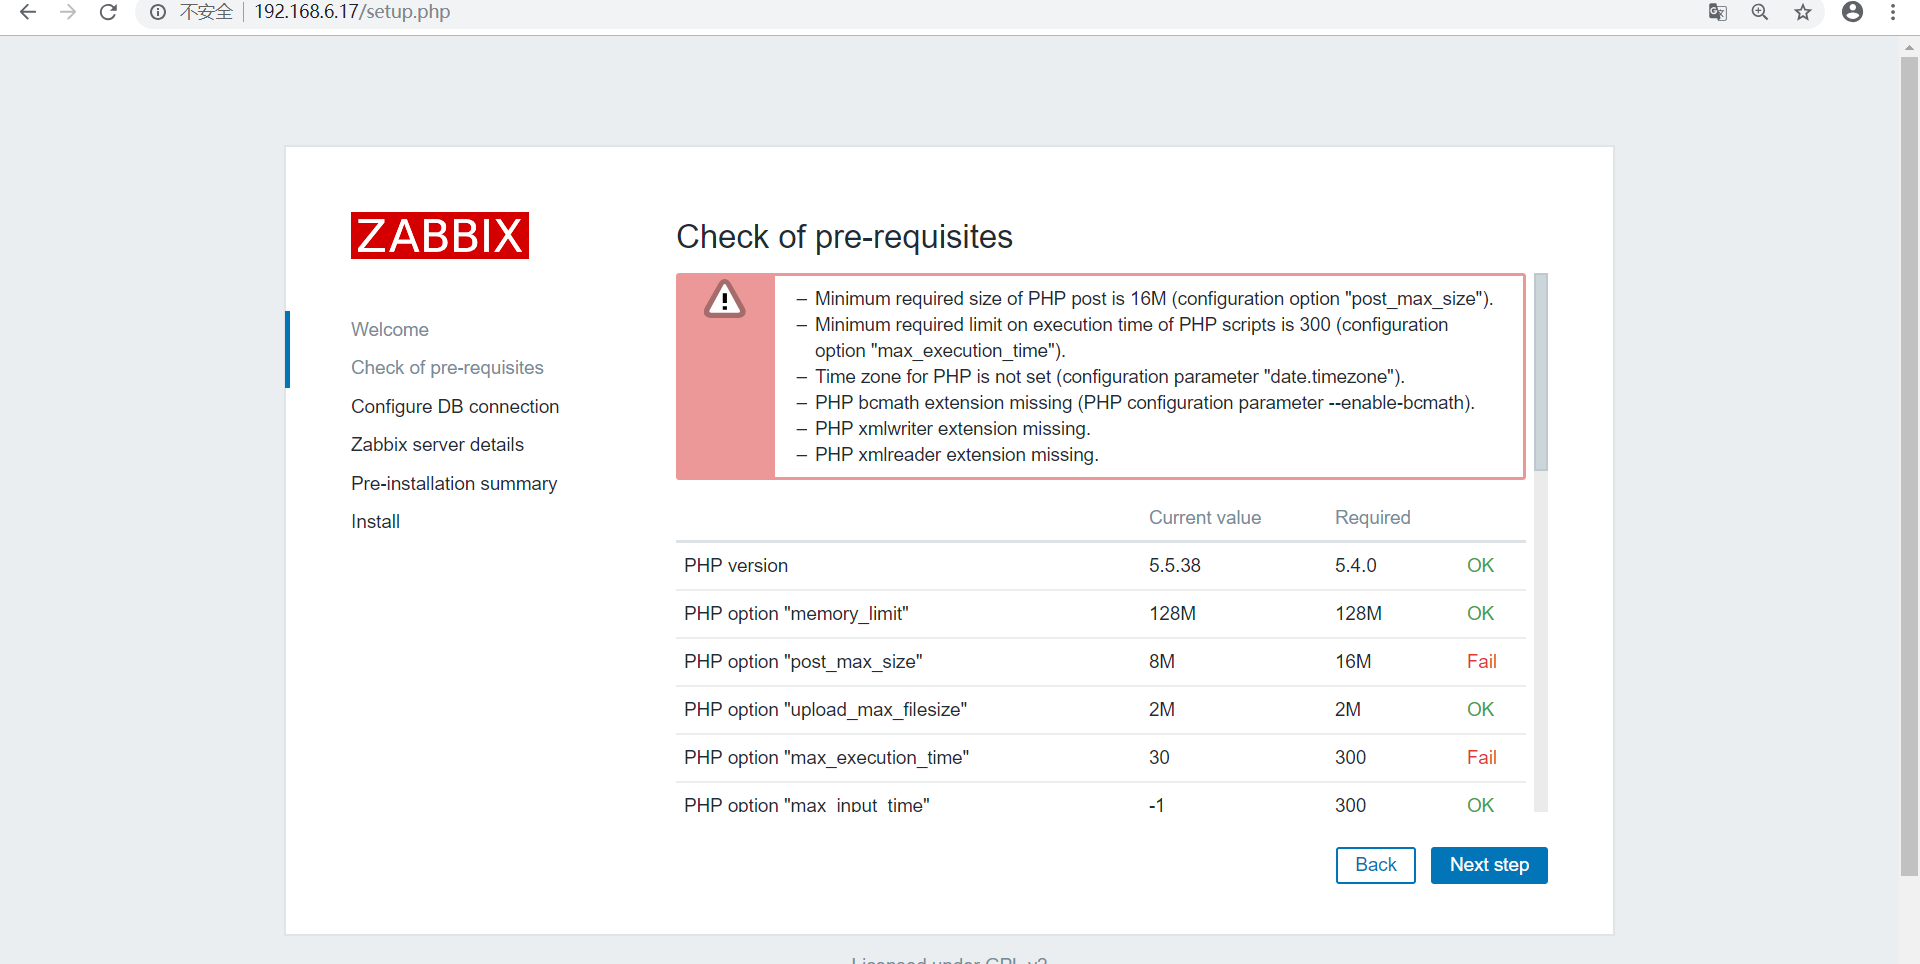
可以看到,配存在一些问题也还是需要修改的,不然的话无法安装
agent端配置
概述
agnet端就是被监控的数据库主机,也是需要做一些安装
创建用户
groupadd zabbixuseradd -g zabbix -s /sbin/nologin zabbix
编译安装
./configure --prefix=/usr/local/zabbix-agent --enable-agentmake install
无需指定其他的编译参数
修改配置文件
vi /usr/local/zabbix-agent/etc/zabbix_agentd.confLogFile=/tmp/zabbix_agentd.logServer=192.168.6.17/32Hostname=Zabbix agent
配置到环境变量
PATH=/usr/local/zabbix-agent/bin:/usr/local/zabbix-agent/sbin:$PATH
启动zabbix_agent
直接运行zabbix_agent命令,查看日志,观察是否正常
至此
至此,zabbix的基本配置完成。后续还要配置监控等操作。后面慢慢再说
用户登录

- 1PostgreSQL新手指引 - 17 阅读
- 2分库分表的理解 - 12 阅读
- 3Oracle中的列转行如何在PostgreSQL中实现 - 12 阅读
- 4PostgreSQL数据库的高可用集群管理软件CLup - 12 阅读
- 5PostgreSQL14新特性:索引方面的增强 - 11 阅读
- 6查看PostgreSQL数据库进程占用内存的正确姿势 - 11 阅读
- 7PostgreSQL官方手册CHM格式下载链接(新增了PG14英文版) - 9 阅读
- 8ZQPool: 可以替代pgbouncer的连接池软件 - 9 阅读
- 9数据库相关岗位的面试建议 - 8 阅读
- 10PostgreSQL和MySQL中的一些超时参数 - 7 阅读
- 1PostgreSQL新手指引 - 239 阅读
- 2PostgreSQL10~13版本以来的新特性史上最全总结 - 168 阅读
- 3PostgreSQL14新特性:索引方面的增强 - 155 阅读
- 4查看PostgreSQL数据库进程占用内存的正确姿势 - 135 阅读
- 5PostgreSQL官方手册CHM格式下载链接(新增了PG14英文版) - 129 阅读
- 6一次修复PostgreSQL数据库的过程 - 124 阅读
- 7PostgreSQL数据库的高可用集群管理软件CLup - 121 阅读
- 8时序数据库-TimeScaleDB - 116 阅读
- 9ZQPool: 可以替代pgbouncer的连接池软件 - 116 阅读
- 10openGauss5.0与PostgreSQL数据库的全表扫描的性能对比 - 115 阅读
- 1PostgreSQL新手指引 - 1089 阅读
- 2PostgreSQL10~13版本以来的新特性史上最全总结 - 738 阅读
- 3PostgreSQL14新特性:索引方面的增强 - 667 阅读
- 4查看PostgreSQL数据库进程占用内存的正确姿势 - 666 阅读
- 5PostgreSQL官方手册CHM格式下载链接(新增了PG14英文版) - 601 阅读
- 6ZQPool: 可以替代pgbouncer的连接池软件 - 575 阅读
- 7时序数据库-TimeScaleDB - 569 阅读
- 8PostgreSQL数据库的高可用集群管理软件CLup - 556 阅读
- 9openGauss新手快速入门 - 552 阅读
- 10PostgreSQL与MySQL 分析对比 - 512 阅读